gardenchatter

Garden adventures, thoughts and ideas…


Leave a comment

Seed Starting

For those of us that like to grow-our-own flowers and vegetables, that time is once again here. The ability to walk around the garden at the end of the day collecting dinner or cutting flowers for the table is truly an exciting experience. Every time I take that walk, I am overwhemed at what I have created from just a tiny little seed.
Here’s a few things to consider if you plan to grow from seed (and if you don’t, give it a try – it’s easy!). 
Use the best quality seed you can afford. Invest in the time to look through various seed company websites or catalogues to compare prices and available products. If you have some seeds but are unsure of how old they are, or where they originated, you may want to consider buying new. What you have may perform okay, or it may never sprout. It’s hard to say. The typical rule of thumb is that seed viability decreases by 50% each year, but I have used seed that is 2-3 years old and it has been ok. I’ve also used some that hasn’t. It seems to vary by brand. Some seed companies do guarantee viability for up to 2-3 years, some only for that year that it’s packaged for. 
Plan what you are going to grow before you buy so you don’t end up with too much seed – and as a result, spending too much money. I have a map of my garden that I created in excel, nothing fancy, but each year I decide what vegetables are going where and from that I determine the quantity I need to purchase.
Good lighting is essential. Most seeds need light to germinate. However, there are some exceptions to the rule – geraniums need total darkness germinate, as do a few other flower varieties. Which brings to my next point – read the seed packages. I have had so many failures because I either did not read the package instructions at all, or did not read the entire package properly. Some seeds need soaking overnight for effective germination, some need nicks or cuts in them. Use the information on the packages to understand what the seeds need for the best possible outcome.
Seeds need heat to germinate. If you are starting seeds in a cooler area consider adding seeding heating mats to your inventory. They sit under the trays  and keep the soil at the optimum temperature for healthy growth.  60° to 70°F (16-21°C) – however some plants like lettuces and greens will germinate at slightly lower temperatures.
If you are using growing stations – here’s another thing I wasn’t aware of when I started. Start your lights as low and as close to the seeds as possible, gradually lifting them as the plants grow. If you leave them up high right from the start, your plants will grow, but they will be weak and leggy and probably won’t survive. I learned that the hard way!
When planting seeds indoors, use a good soilless potting mixture. This provides the needed air circulation and good drainage, and typically these mixtures contain no diseases or pests. Garden soil is too heavy for young seedlings, it often has poor drainage and almost no air circulation  – and may contain pathogens that little plants can’t fight.
Use the seeding guidelines on the package. It will tell you how far in advance of the usual last frost date to plant and if they should be planted indoors or if they can wait until and be planted directly in the garden. Some plants prefer the cooler weather and can go in the garden early, some need the summer heat. When in question for any part of seed starting – follow the seed package instructions and information – the seed growers know what they’re doing! I learned that the hard way as well!
Hardening off – the final step.  Flowers and vegetables that grow from seed need to be hardened off before they head to the garden beds. The process for that begins a week or two before planting (longer is better) and consists of gradually introducing them to the elements every day and then bringing them back inside where they are safe.  Start with just a couple of hours outside in a shady spot.  Do that for two to three days and then introduce them to a few hours of dappled shade with some sun exposure. Then increase the time and provide a few hours of direct sun for a day or two. Next provide them with a longer period of time in direct sun and eventually leave them out overnight for a few nights. This process allows them to gradually get used to the intensity of the sun along with windy conditions. Plants that have not been introduced gradually to direct sun  may show rapid and dramatic signs of shock. The leaves may become bleached out, will turn white and may curl under, or simply fall off. Sudden transplant shock can even kill many young plants. (Another lesson I learned!)
What’s best to start indoors?  Tomatoes, peppers, eggplant, broccoli, brussels, cabbage, cauliflower, ground cherry, celery,  perennials and  herbs.
Best for either starting ahead or directly in the ground? Greens, kale, chard, cucumbers, squash, melons, sunflowers, zinnias, marigolds
Best for sowing directly in the ground?  Peas, carrots, beans, corn, radishes, parsnips, onions, turnips, morning glory, scarlet runner, sweet pea.
Enjoy your harvest!
1
2
3


Leave a comment

Rat’s Tail Radish

Want to grow a fun, non-stop vegetable? Then plant Rat’s Tail Radish.

Unlike the traditional underground, round, red radish, rat’s tail is an edible pod that sprouts from pale pink flowers that in turn, sprout from long, flowing stems.

A non-stop summer performer, rat’s tails are easy to grow and won’t fade away in the heat like most radishes do. This is certainly not a cool-season radish – they thrive during  warm summer days and prefer full sun. Similar in appearance to a long bean, (and a rat tail!), this edible pod is delicious fresh from the garden, is a great addition to stir-fry’s and is also an easy pickling vegetable.

Butterflies flock to the flowers and continued  pod harvest will also continue to produce new flower growth and in turn, more radishes.

Rat’s tail is an Asian heirloom that was introduced to the U.S. in the 1860s and has been growing ever since. Plant this interesting, easy-care and colourful radish every two weeks over the season for a continued harvest.


Leave a comment

Sprouting Brussels Sprouts

I’m going to be perfectly honest, as much as it pains me. Last year, for the first time ever, I decided to grow Brussels sprouts. In pots. About 6 plants per pot.

I can almost hear the collective chuckle from those of you that are familiar with or know how to grow Brussels.

Here’s a picture of one of my plants this year:

b1

It’s a good 3 feet high and almost as wide. So…imagine 6 of these in a pot. They didn’t survive beyond about 4 inches and didn’t even come close to sprouting sprouts. It was quite an aha moment for me when I toured the Royal Botanical Gardens last fall and saw how these interesting veggies should be grown.

Brussels like the cooler weather, so start them early, indoors, if you can. Six weeks or so before the last frost for your area. Plant the seedlings 12 to 24 inches apart (and not in pots) outdoors when the frost risk is over and give them plenty of water, fertilizer and sunshine. I had mine in the ground the first of June and am harvesting now.

Our summer here was extremely hot and dry (unusual for this area), so not the best climate for Brussels, but I certainly had more success this time and will definitely grow them again next year. The excess heat tends to stop the sprouts from forming a compact ball, l so I did end up with some unformed, loose leaves.

They mature from the bottom up along the stalk and as they reach about 1 inch in diameter are ready to harvest. Or you can wait and cut the entire stalk.

These actually look big and showy in the garden and are fun to grow.

However, I haven’t completely given up on my pot theory, but maybe I’ll try just one in a pot next year…

Brussels sprouts on one of my plants, and a full stalk from another cut down.


Leave a comment

Grow Up! (Veggies, that is)

We’ve been experiencing one of the hottest and driest summers in years. It’s what I call a “good old-fashioned summer”. The way summer is meant to be. And while I’m watering a tad more than I like to, the heat sure is keeping it’s end of the bargain and the veggies are growing better than ever.

One way to make use of small space, or to just provide more room to grow other plants is by “growing up”. I’ve made simple bamboo trellis’ for both cucumbers and squash to help keep the fruit off the ground and save the space for other veggies (like the sweet potatoes, which are growing like crazy!)

These trellis’ are made up of three or four, 6-foot bamboo poles, from the dollar store, wound with a strong string, or light twine. The twine allows for the gentle tendrils of the plants to grab on and reach for the top. I’ve had great success “growing up” both cucumbers and squash.

Or consider creating an A-Frame. This year, it’s doing exactly what I want it to. The squash are all growing up the side of the frame (plastic frame with bird netting), and the sunflowers can be seen over the top of the A-frame and are just about to pop. The tomatoes are growing like weeds at the other end of the bed.

As much as I don’t want this summer to end….I am looking forward to harvest time, it’s going to be the best ever!


squash

Spaghetti Squash starting to grow


Leave a comment

How To Prevent Damping Off in Seedlings (now that garden season is in the air!)


Nothing is quite as frustrating for home gardeners as the joy of seeing newly planted seeds begin to sprout and flourish one day and then discovering them collapsed and wilted the following day.  Damping off is a fungal or fungal-like disease that makes seemingly healthy seedlings suddenly topple and die or, at times, never emerge at all. Although damping off is usually fatal, it is preventable. With a little attention to detail combined with good planting practices, your young seedlings will continue to grow into the healthy plants you want them to be.

The Cause

A number of pathogens live in soil, just waiting for the right conditions to occur before they step forward. The common pathogens that cause damping off are Rhizoctonia, Pythium, Fusarium and Phytophthora. They all develop and thrive in poor soil and less than ideal environmental conditions.

Soil Conditions

Use a good-quality, soilless potting mix to start your seeds. Fresh potting soils are typically free from harmful organisms, and the nature of the mixes provide good drainage, another important factor in reducing the risk of damping off. Soggy soil encourages fungal or fungal-like growth. Keep opened bags of soil away from floors and other unclean surfaces that could transfer contaminants into the clean planting medium. When planting, place seeds at the soil depth indicated on their seed packet. Planting seeds deeper than required in any soil may slow their germination process and ultimately damage the seeds.

Humidity

Good air circulation and room ventilation are other factors in reducing the humidity buildup that promotes pathogen growth; do not crowd pots or flats, or the seeds when placing them in those containers. As they begin to grow, thin seedlings — or remove some seedlings — according to the seed package directions to keep air adequately flowing around them, which reduces the amount of moisture on the plants. In order to thin seedlings, snip or gently pull out crowded seedlings, leaving the seed package direction’s required spacing between those that stay in the containers.

Temperature and Water

Cool soil temperatures before the seeds begin to germinate promotes the risk of damping off. Help ensure healthy seed germination by keeping the soil at a consistent temperature of 70 to 75 degrees Fahrenheit during the seeds’ entire early growth period. Keep the seeds and shoots evenly moist but not waterlogged until the risk of frost passes and weather conditions are favorable to move the growing seedlings into an outdoor garden.

Other Considerations

Many pathogens, including those that cause damping off, are transferred to new plantings via garden tools. Before working with plants and soil, or after contact with any disease, rinse your tools with a weak solution that is one part bleach to nine parts water. Leave the solution on the tools for at least 15 minutes, rinse it off and air-dry the tools. Planting seeds in new pots and flats as often as possible prevents contamination. If, however, using new pots and flats is not an option, sterilize the old containers along with your tools. Wear eye protection and gloves when cleaning pots and tools.


Leave a comment

Egyptian Onion

Egyptian1

A few years ago a friend gave me an Egyptian onion to add to my garden. I honestly didn’t know what to do with it, so I planted it among the perennials and waited to see what it did. After watching it grow and develop I decided to do a little research. And I’m sure glad I did – now we’re enjoying these onions in the kitchen!

Here’s what I’ve learned:

Native to Pakistan and India, but later adopted by Egypt, the Egyptian onion (Allium cepa var. proliferum) is a unique and unusual member of the onion family. The Egyptians believed that the strong fragrance would protect them, keep them free from disease and awaken their dead. Etchings of the plant are found in Egyptian tomb drawings as far back as 3,000 BC, illustrating their reverence of its perceived power.

For home gardeners, it is a perennial vegetable that provides interest and edibles from early spring right through to fall frost. As soon as the scent of spring is in the air, green shoots emerge without regard for any lingering snow and do not stop sprouting until reaching their full 2 to 3 foot height.

Called a tree onion because of the small bulbils (also known as topsets or sets) that form on its tall stem and a walking onion due to its distinctive propagation method, the Egyptian onion is one of the first plants to awaken each spring.

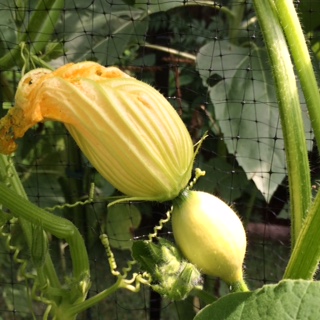
As the round, hollow onion stalks thicken and grow they can be snipped and eaten, similar to chives, but if left alone will develop small white flowers that by midsummer begin to fade as tiny, curled leaves and numerous small onions, or topsets, begin to grow at the stalk tip. New leaves will rise out of these topsets, which in turn produce further small onions, or bulbils at their tip (hence, the tree-like look of the tree onion name). As the weight of the onions overwhelm the stalk, it bows to the ground, and the young onions lay in the soil, root and form a new plant just inches away, almost as if stepping, or walking away from the mother plant. Gardeners can leave a few topsets on the plant each year to increase the overall onion yield as they randomly drop, or cut the onions from the stalk and plant in a preferred area. The Egyptian onion also forms numerous bulbils at ground level that can be removed without hurting the plant, providing more onions for the cook and more plants for the gardener.

The underground bulbs multiply each growing season and require dividing every few years. When planting both bulb divisions and the small topsets, avoid beds that have had recent onion crops, to help reduce the risk of transferring any pests or diseases to the young plants that may have been left behind by the previous tenants.

This cool-season crop prefers a well-drained site, high in organic matter with a pH ranging from 6.2 to 6.8. Easily grown in full sun or part shade, the Egyptian onion will sprout to 3 feet high and spread up to 2 feet wide at maturity. Best planted in the spring or fall, the Egyptian onion will provide years of fresh chive-like greens and dozens of shallot size onions all season long. Frost tolerant, Egyptian onions grow in plant hardiness zones 4 through 10 and will survive in zone 3 with a good layer of mulch for protection over the winter. Plant bulbs 1 inch deep, spaced 12 inches apart and keep them well watered; regular, even moisture will provide higher, healthy yields, and a pleasant, mild tasting onion.


Leave a comment

Planting Cool Weather Vegetables

Now is the time to get those cool weather vegetables in the ground.

Plant beets, radishes, lettuces, broccoli, Brussels sprouts, cabbage, cauliflower, endive, fava beans, kale, kohlrabi, leeks, lettuces, mustard, onions. parsnips, peas, radishes, spinach, rutabagas and turnips for early summer harvesting.

Plant again once the heat of summer wears off for a fall harvest as well.

And remember once the fall hits to plant garlic for a summer of fresh garlic. Garlic needs to be planted in the fall, goes dormant over the winter and comes to life in the spring.  For garlic planting tips, see my ehow.com article titled  “Does Garlic Grow Underground Like An Onion”.

Today I planted about 200 radish seeds that will be ready to eat in 3 weeks.

Oh, and get those sweet pea flowering vine seeds in the ground for some early summer color!