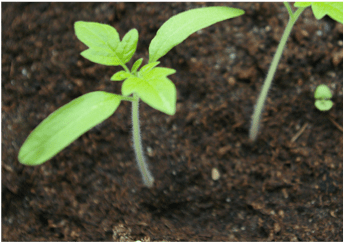
For those of us that like to grow-our-own flowers and vegetables, that time is once again here. The ability to walk around the garden at the end of the day collecting dinner or cutting flowers for the table is truly an exciting experience. Every time I take that walk, I am overwhemed at what I have created from just a tiny little seed.
Here’s a few things to consider if you plan to grow from seed (and if you don’t, give it a try – it’s easy!).
Use the best quality seed you can afford. Invest in the time to look through various seed company websites or catalogues to compare prices and available products. If you have some seeds but are unsure of how old they are, or where they originated, you may want to consider buying new. What you have may perform okay, or it may never sprout. It’s hard to say. The typical rule of thumb is that seed viability decreases by 50% each year, but I have used seed that is 2-3 years old and it has been ok. I’ve also used some that hasn’t. It seems to vary by brand. Some seed companies do guarantee viability for up to 2-3 years, some only for that year that it’s packaged for.
Plan what you are going to grow before you buy so you don’t end up with too much seed – and as a result, spending too much money. I have a map of my garden that I created in excel, nothing fancy, but each year I decide what vegetables are going where and from that I determine the quantity I need to purchase.
Good lighting is essential. Most seeds need light to germinate. However, there are some exceptions to the rule – geraniums need total darkness germinate, as do a few other flower varieties. Which brings to my next point – read the seed packages. I have had so many failures because I either did not read the package instructions at all, or did not read the entire package properly. Some seeds need soaking overnight for effective germination, some need nicks or cuts in them. Use the information on the packages to understand what the seeds need for the best possible outcome.
Seeds need heat to germinate. If you are starting seeds in a cooler area consider adding seeding heating mats to your inventory. They sit under the trays and keep the soil at the optimum temperature for healthy growth. 60° to 70°F (16-21°C) – however some plants like lettuces and greens will germinate at slightly lower temperatures.
If you are using growing stations – here’s another thing I wasn’t aware of when I started. Start your lights as low and as close to the seeds as possible, gradually lifting them as the plants grow. If you leave them up high right from the start, your plants will grow, but they will be weak and leggy and probably won’t survive. I learned that the hard way!
When planting seeds indoors, use a good soilless potting mixture. This provides the needed air circulation and good drainage, and typically these mixtures contain no diseases or pests. Garden soil is too heavy for young seedlings, it often has poor drainage and almost no air circulation – and may contain pathogens that little plants can’t fight.
Use the seeding guidelines on the package. It will tell you how far in advance of the usual last frost date to plant and if they should be planted indoors or if they can wait until and be planted directly in the garden. Some plants prefer the cooler weather and can go in the garden early, some need the summer heat. When in question for any part of seed starting – follow the seed package instructions and information – the seed growers know what they’re doing! I learned that the hard way as well!
Hardening off – the final step. Flowers and vegetables that grow from seed need to be hardened off before they head to the garden beds. The process for that begins a week or two before planting (longer is better) and consists of gradually introducing them to the elements every day and then bringing them back inside where they are safe. Start with just a couple of hours outside in a shady spot. Do that for two to three days and then introduce them to a few hours of dappled shade with some sun exposure. Then increase the time and provide a few hours of direct sun for a day or two. Next provide them with a longer period of time in direct sun and eventually leave them out overnight for a few nights. This process allows them to gradually get used to the intensity of the sun along with windy conditions. Plants that have not been introduced gradually to direct sun may show rapid and dramatic signs of shock. The leaves may become bleached out, will turn white and may curl under, or simply fall off. Sudden transplant shock can even kill many young plants. (Another lesson I learned!)
What’s best to start indoors? Tomatoes, peppers, eggplant, broccoli, brussels, cabbage, cauliflower, ground cherry, celery, perennials and herbs.
Best for either starting ahead or directly in the ground? Greens, kale, chard, cucumbers, squash, melons, sunflowers, zinnias, marigolds
Best for sowing directly in the ground? Peas, carrots, beans, corn, radishes, parsnips, onions, turnips, morning glory, scarlet runner, sweet pea.
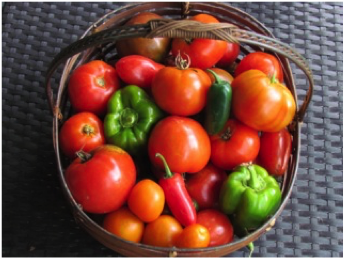
Enjoy your harvest!


I'm a horticulturalist, a garden experimenter and member of GardenComm International (garden communicators) who enjoys playing in the dirt and growing a wide variety of veggies, plants and flowers in my Zone 5 garden. Check out my website http://www.wowmygarden and the gardenchatter podcast at https://anchor.fm/cheryl-losch.